Meeting Scheduling
The Service App allows for scheduling of both the Christian Life & Ministry and Public meetings. These schedules are easy to use, populate and reference, even giving all your publishers access to view the meeting schedule within the app. The Service App will add publisher meeting assignments into their personalised assignment list for easy viewing, and even email the weekly chairman the schedule, so he can easily remind all assignees.
To activate the meeting scheduler module within the Service App, navigate to:
Settings
Congregation Details
Toggle on 'Meeting Scheduling'
Once the meeting scheduling has been toggled on, some further required fields will be shown.
Public Talk Coordinator
Christian Life & Ministry meeting day
Christian Life & Ministry meeting time
Public meeting day
Public meeting time
Each of these fields calibrates the way the meeting schedules are shown and handled with the Service App. Setting the Public Talk Coordinator means the Service App will use this publishers email address for all public talk correspondence handled within the Service App.
Once these settings have been set, ensure you finish by tapping 'Save' on the congregation details form.
Publisher Qualifications
Next you will need to assign publishers meeting part qualifications, assigning publishers these qualifications means when scheduling the meeting only qualified publishers will be shown as options for various meeting parts.
To assign qualifications navigate to:
Settings
Meeting Part Qualifications
Here you will see listed all the different meeting parts publishers may qualify to handle. By clicking through on any of them you are then able to 'Add Publishers' to the specific qualification. Adding publishers can be done one at a time, or you can select multiple publishers to add all at once. Only active publishers with the appropriate appointment will appear in the options.
After selecting the appropriate publishers for each meeting part, they will now be ready for assignment in the meeting scheduler.

Once your congregation account has been set up and publishers added to the various meeting part qualifications, we can start filling out the meeting schedule. Navigate to:
Schedules
Meetings
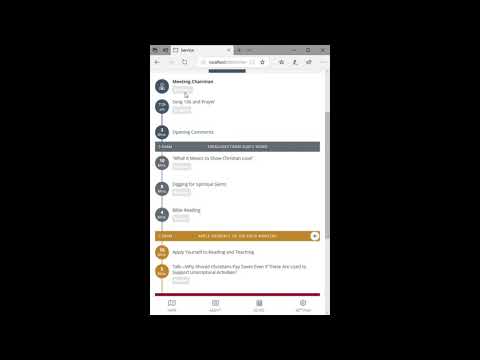
Either this weeks meeting, or the last week you viewed will be displayed by default. In most cases the meeting parts will have already been populated by the EPUB file from jw.org.
If the meeting parts have not been populated then importing them all from the meeting workbook is very simple. Open jw.org and navigate to the meeting workbook for the month you wish to populate, select the EPUB file and instead of downloading it, copy the download link. Back in the Service App, tap on the calendar button in the top right and past the EPUB url into the field, then tap 'Save'.
The Service App, will parse the EPUB file and import all the meeting parts and timing for the entire month.
You are now ready to start assigning meeting parts.
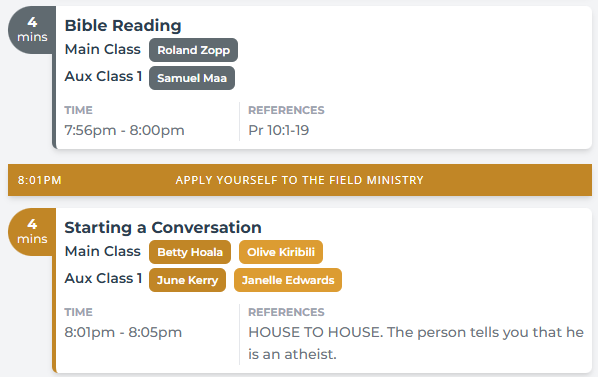
Each meeting part has a tag underneath, this stag stipulates the type of assignment for this part we are going to assign. For instance, some parts are for a student, while some may be for a reader. Whatever the case, the publishers we previously qualified for different part types will be shown.
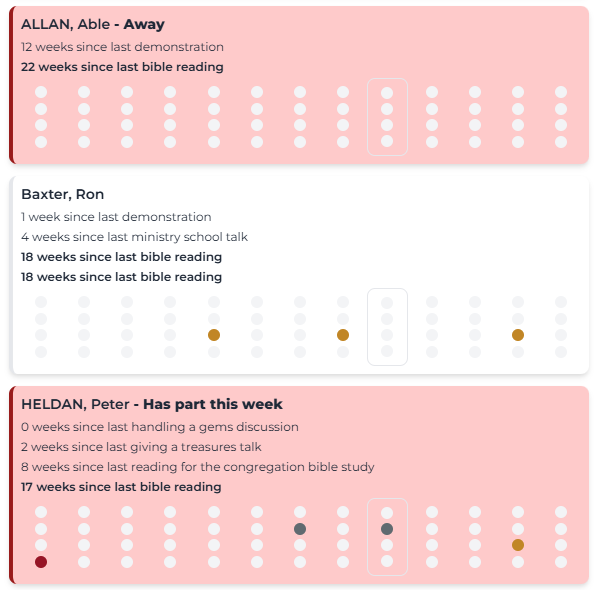
When we tap on the assignee tag for a specific part, the publishers who can give that part are shown, along with additional information to help us choose, information like:
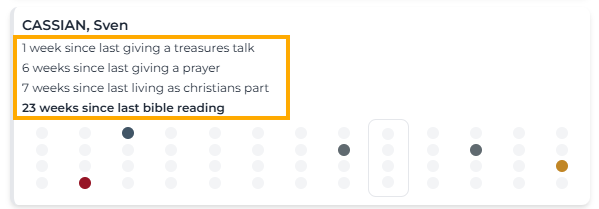
The scheduler shows the last four meeting assignments the publisher has had, it will always try to include the last time they gave the same part as the one currently being assigned which it highlights with bold text.
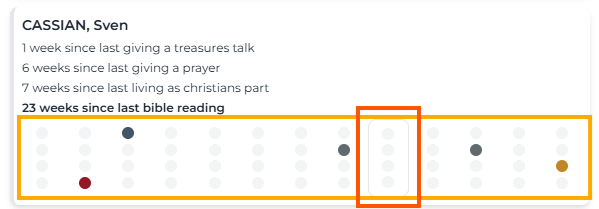
The scheduler also uses a calendar-style graph. Highlighting the current week being scheduled, while the calendar itself shows the publisher’s assignments up to four weeks ahead and eight weeks in the past. This provides a quick visual overview of how many parts they have been assigned over time.
The graph consists of four rows, each representing a different meeting section the publisher has been assigned to:
Row 1: Indicates assignments for prayers or as chairman.
Row 2: Displays any Treasures parts assigned.
Row 3: Shows Ministry assignments.
Row 4: Highlights any Living as Christians assignments.
This structured view makes it easy to track and balance assignments efficiently.
When displaying all publisher options for a part, the Service App clearly highlights any potential scheduling conflicts with a red box. This includes instances where a publisher already has an assignment on that date or has indicated they will be unavailable.
By default, publishers are listed in order of "Time since last giving this part" (in this case, a Bible Reading), ensuring that the first option is typically the publisher who hasn't handled the part for the longest time. Additionally, there are options to sort publishers by name and filter them based on their appointment, gender, or field service group.
Once a publisher has been selected, we tap 'Save' and that publisher is now assigned.
If you wish to add an auxiliary class to the weeks schedule, just tap the 'Add Class' button in the header, this will add another class (up to two) to the schedule for the week. If you wish to remove the additional classes, just leave the assignments blank and it will be removed automatically when you navigate away from the selected week.
This section describes how to manage and schedule public talks within the Service App. It covers accessing the scheduler, understanding its interface, booking new speakers, and managing existing bookings.
The Public Meeting Scheduler allows coordinators to view all upcoming public talks and special events, grouped by month, and to manage bookings and communications with other congregations’ Public Talk Coordinators (PTCs).
- Upon logging in, users land on the Maps view. This is the default entry point to the Service App.
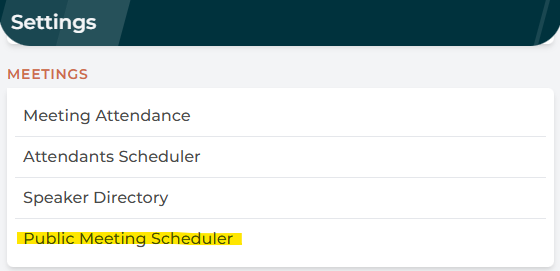
- Settings Menu:
- Tap the Settings icon in the navigation bar.
- Under Meetings, select Public Meeting Scheduler to open the scheduler interface.
3.1 Monthly Grouping
- Meetings are grouped by month (e.g., "2025 July", "2025 November").
- Each section header clearly labels the month for ease of navigation.
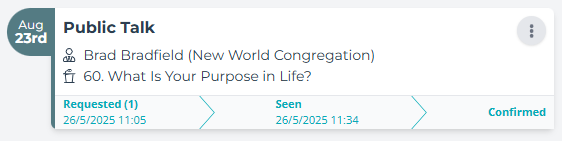
3.2 Event Cards
Each public talk or special event is displayed as a card with the following elements:
- Date Badge: Shows the day and date of the event.
- Event Type: Indicates whether it’s a "Public Talk", "Assembly", "Memorial", etc.
- Speaker Information: Includes a generic speaker icon followed by the speaker’s name and their congregation.
- Talk Outline: Displays the title or number of the talk they will deliver.
3.3 Status Indicators
A horizontal status bar on each card shows:
- Requested (with count and timestamp): Number of request emails sent and when the most recent was sent.
- Seen (with timestamp): When the PTC viewed the request email.
- Confirmed: Indicates the talk is officially scheduled.
Tip: If an email hasn’t been sent or seen, the corresponding label is greyed out and marked as awaiting.
There are two primary methods to book a speaker:
4.1 From the Scheduler View
- Identify an empty slot (no speaker assigned).
- Tap the overflow menu (⋮) on the slot.
- Select Book Public Speaker.
4.2 From the Speaker Directory
- Go to Settings → Speaker Directory.
- Filter by Country and Region, or use the search field to locate a specific congregation.
- Tap Open next to the congregation name.
- In the Congregation Profile, tap the overflow menu on a speaker entry.
- Choose Book Public Speaker.
Note: When booking from the directory, the date field is not pre‑filled. The system will only present available dates that are not already booked, preventing double‑booking.
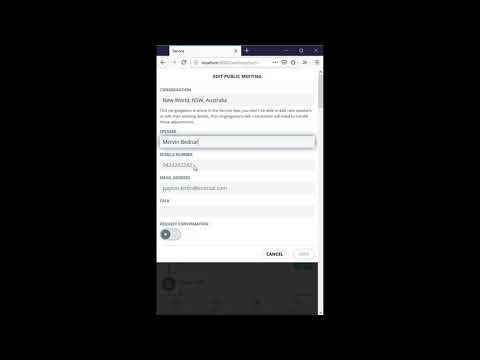
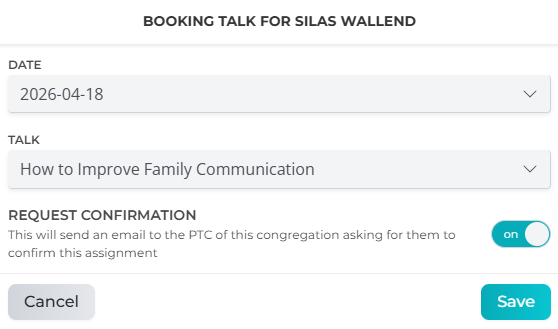
When booking a talk, the Booking Talk modal appears with:
- Date Picker: Pre‑filled (from scheduler) or selectable from available dates (directory flow).
- Talk Outline dropdown:
- Prioritises outlines that the speaker has confirmed they deliver.
- Sorted by outline number otherwise.
- Request Confirmation toggle:
- When enabled, sends an email to the other congregation’s PTC requesting confirmation.
- Can be turned off if the booking is already confirmed.
- Actions:
- Save: Finalises booking and triggers request email if toggled on.
- Cancel: Closes modal without saving.
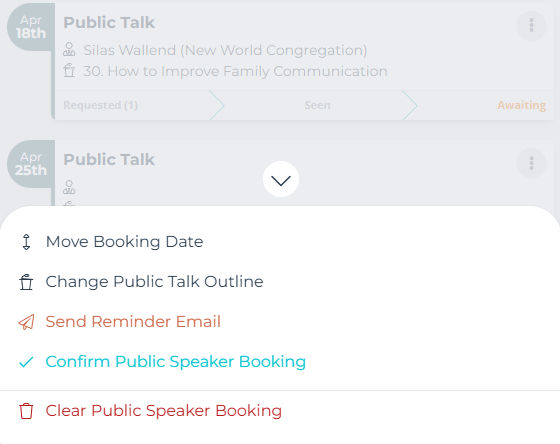
Tap the overflow menu (⋮) on any booked event to reveal available actions:
- Move Booking Date: Reschedule the talk to a different date.
- Change Talk Outline: Update the outline for the speaker.
- Send Reminder Email: (for requested/awaiting talks) Send an additional request reminder.
- Confirm Public Speaker Booking: Mark the talk as confirmed, bypassing the request cycle.
- Clear Public Speaker Booking: Remove the speaker assignment from the slot.
Within the Search Speakers panel (from scheduler booking):
- Search Speaker field: Start typing to search beyond the local list.
- Search Range toggles:
- Circuit (default): Quick search within the local circuit.
- Region: Broader search across a state or comparable region.
- Country: Nationwide search, which may take longer.
- Congregation Speakers list: Local speaker list with initials avatar, name, and a chevron to select.
- Use Directory Flow when you know the congregation but not the speaker.
- Confirm availability by checking the status indicators before sending new requests.
- Send reminders if awaiting responses to avoid last‑minute scheduling issues.